 Save
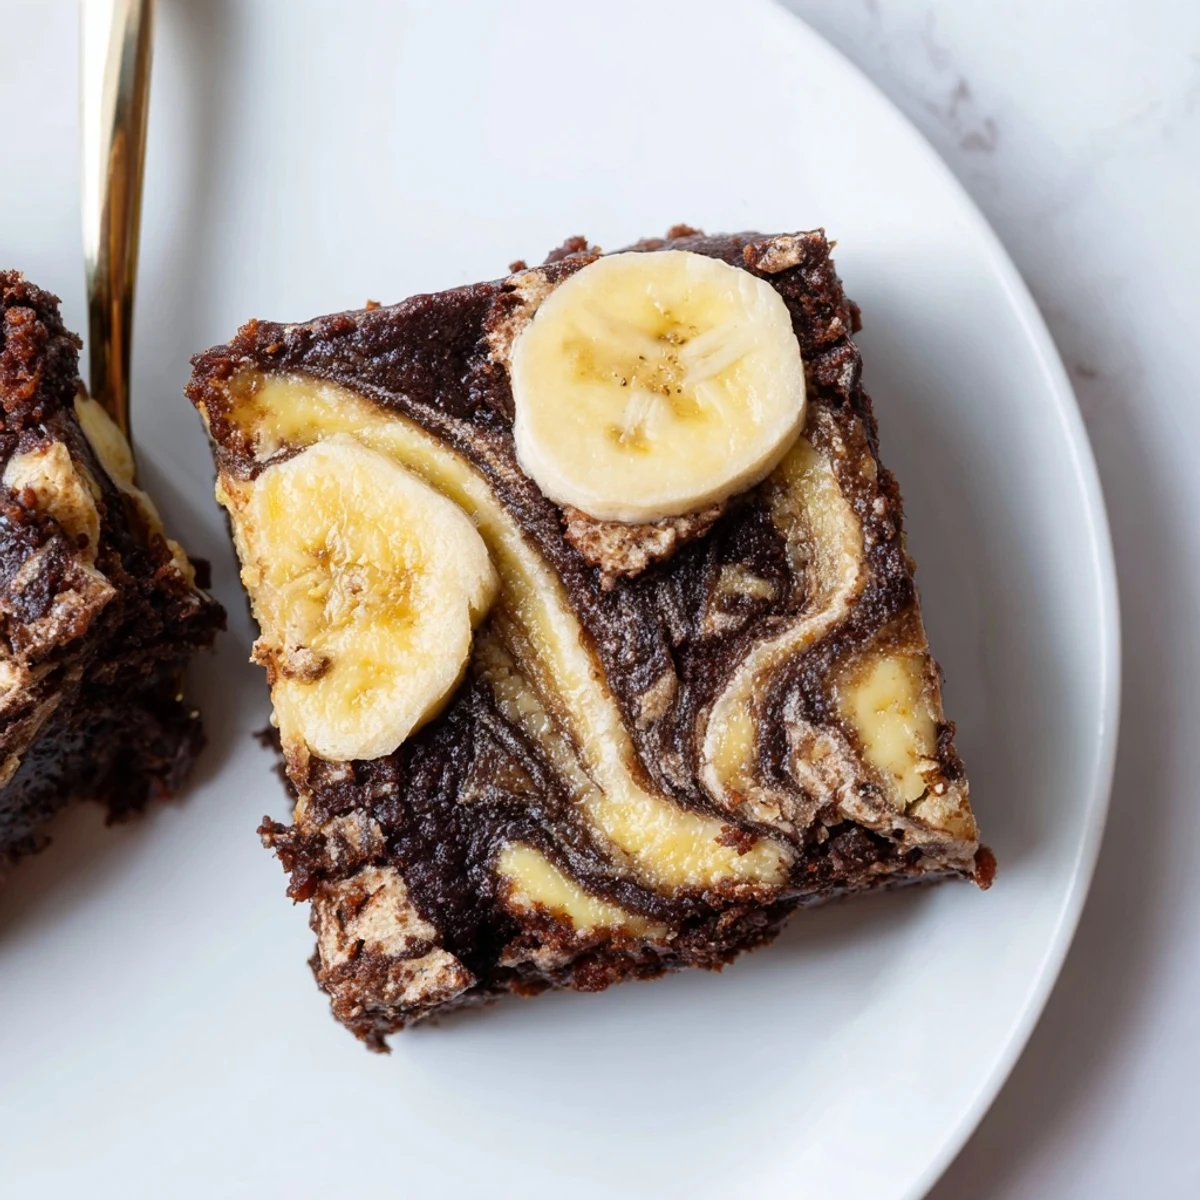
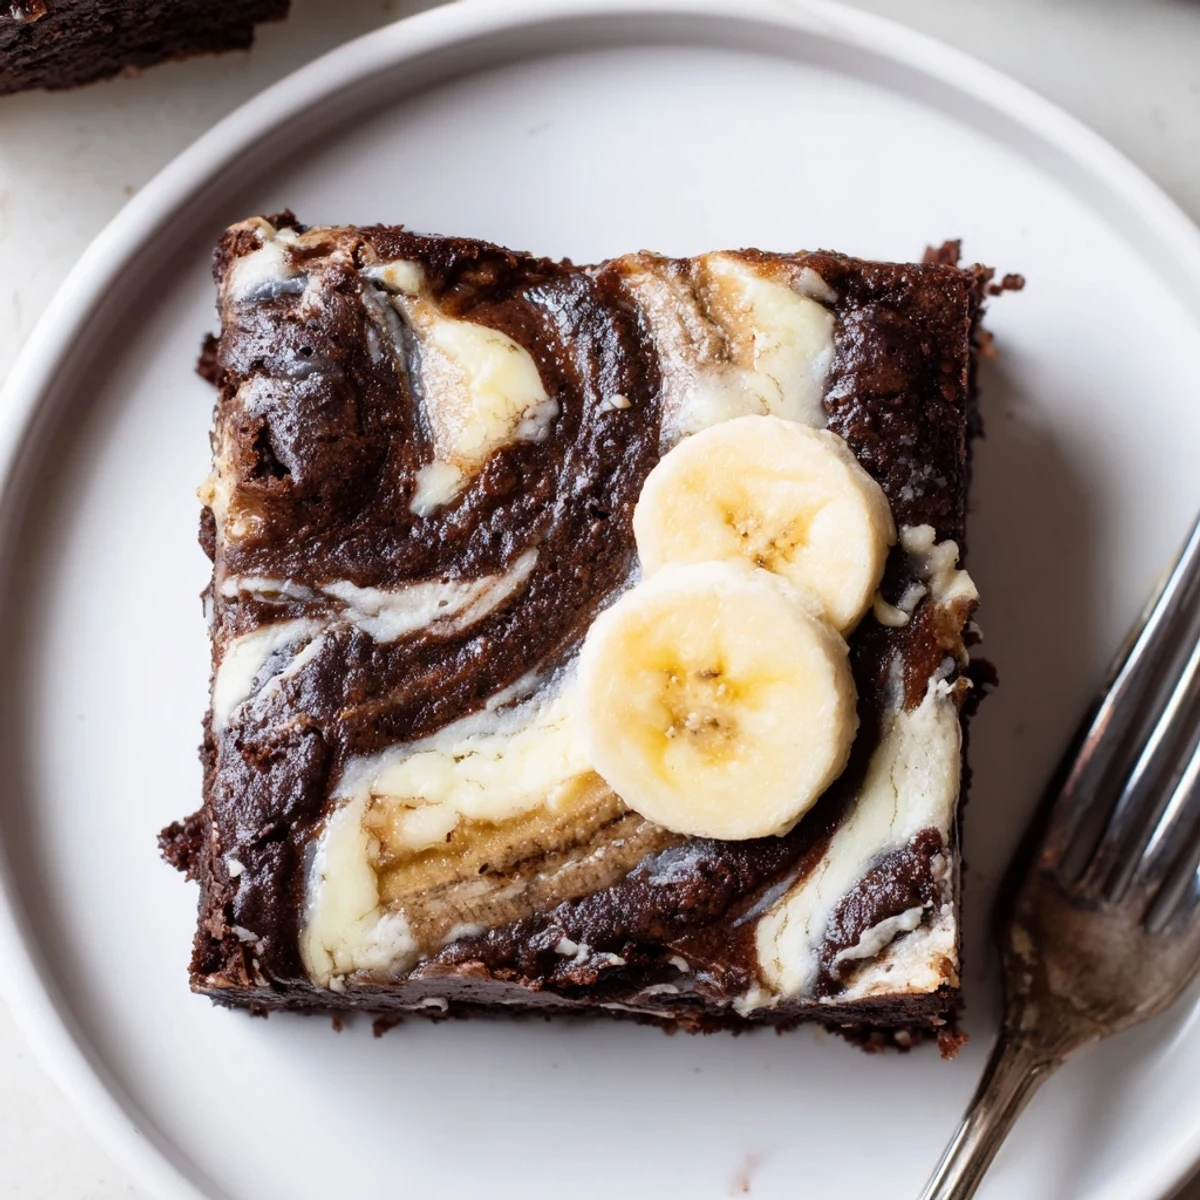
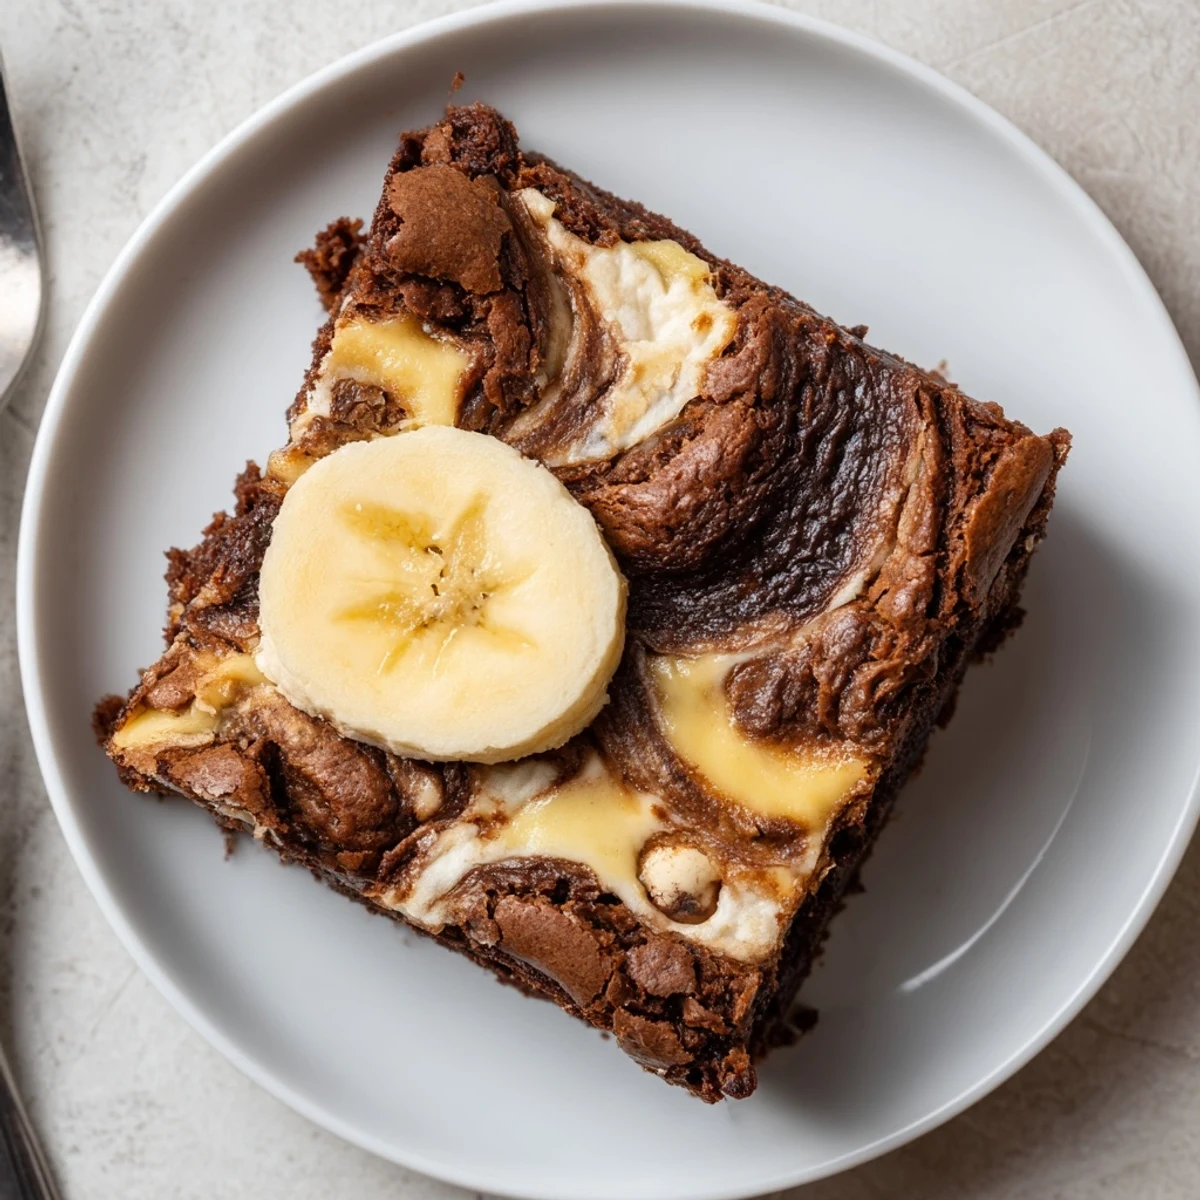
Save Combine melted butter, sugar, eggs and vanilla; fold in cocoa, flour and salt to form a fudgy batter. Whisk milk, cream, instant banana pudding mix, an egg yolk and mashed ripe banana until thickened. Dollop the banana mixture over the brownie batter and swirl for a marbled finish. Sprinkle chopped vanilla wafers and bake at 350°F (175°C) for 35–38 minutes. Cool completely in the pan before cutting into squares. Store chilled for neater slices; bring to room temperature before serving. Pairs well with vanilla ice cream.
The smell of overripe bananas and cocoa powder hit me at the same time one rainy Saturday, and suddenly I was standing in my kitchen with a spatula in one hand and a box of vanilla wafers in the other, wondering what would happen if two of my favorite desserts had a baby. The answer arrived 55 minutes later, and honestly it changed my baking life forever.
I brought a tray of these to a potluck last summer and watched three grown adults hover protectively over the remaining squares, pretending they were not about to fight over the last corner piece. My friend Marcus actually hid two in his jacket pocket, which I only discovered later when he sat down and crumbs tumbled onto his shoes.
Ingredients
- Unsalted butter (1/2 cup, melted): Use good quality butter here because it forms the entire flavor backbone of the brownie layer, and melting it slowly keeps the texture silky rather than greasy.
- Granulated sugar (1 cup): This amount gives the brownies their classic shiny crust on top, something I learned after reducing it once and ending up with a sad matte finish.
- Large eggs (2 for brownies, 1 yolk for pudding): Room temperature eggs incorporate more smoothly into the batter and help the pudding layer set properly.
- Vanilla extract (1 teaspoon): A small but mighty addition that rounds out the chocolate and banana flavors beautifully.
- Unsweetened cocoa powder (1/3 cup): Do not swap with hot cocoa mix or sweetened cocoa, you need the pure stuff for that deep chocolate intensity.
- All-purpose flour (1/2 cup): Measure by spooning into the cup and leveling off, because packed flour leads to dense dry brownies nobody wants.
- Salt (1/4 teaspoon): Just a pinch to make everything taste more like itself.
- Whole milk (1/2 cup): The fat content matters here, skim milk will leave your pudding layer thin and watery.
- Heavy cream (1/2 cup): This is what transforms the pudding layer from ordinary to luxurious and cloud-like.
- Instant banana pudding mix (one 3.4 oz box): The secret shortcut that delivers concentrated banana flavor without any artificial effort on your part.
- Ripe banana (1, mashed): The riper the better, those brown speckled bananas add natural sweetness and real banana texture that the mix alone cannot provide.
- Vanilla wafer cookies (10, chopped): Roughly chopped so you get satisfying crunchy bits without turning them to dust.
- Optional banana slices for garnish: Add these right before serving so they do not brown and turn slippery on top.
Instructions
- Set the stage:
- Preheat your oven to 350 degrees Fahrenheit and line an 8 by 8 inch baking pan with parchment paper, leaving overhang on two sides so you can lift the whole thing out later like a genius.
- Build the brownie base:
- Whisk melted butter and sugar together in a large bowl until they look like a glossy paste, then add the eggs and vanilla and keep whisking until everything is smooth and slightly pale. Fold in the cocoa powder, flour, and salt with a spatula, stirring just until the dry streaks disappear, then pour the batter into your prepared pan and spread it to the edges.
- Whip up the pudding swirl:
- In a separate bowl, whisk together the milk, heavy cream, pudding mix, egg yolk, and mashed banana for about two minutes until the mixture thickens noticeably and smells like a banana cream dream.
- Create the marble magic:
- Dollop generous spoonfuls of the pudding mixture all over the brownie batter, then take a knife or skewer and drag it through in loose S shapes, just enough to swirl without blending everything into one muddy color.
- Add the crunch:
- Scatter your chopped vanilla wafers across the top evenly, pressing them gently so they stick into the batter rather than sitting loose on the surface.
- Bake and be patient:
- Slide the pan into the oven for 35 to 38 minutes, checking at the 35 minute mark by inserting a toothpick near the edge, it should come out mostly clean with just a few moist crumbs clinging to it.
- Cool completely before cutting:
- This is the hardest part, but the brownies need to set up fully in the pan at room temperature before you slice them, otherwise you will have a gooey mess that still tastes incredible but will never win a beauty contest.
 Save
Save There is something deeply satisfying about lifting that parchment paper and revealing a perfect slab of swirled chocolate-banana beauty, knife trails still visible across the top like little edible art strokes.
Serving Suggestions That Actually Work
A scoop of vanilla bean ice cream on a warm square will make you close your eyes and forget whatever stress you carried into the kitchen that day. Cold straight from the fridge the next morning with coffee is technically breakfast and I will not judge you for it.
Making It Your Own
Toss a handful of chocolate chips into the brownie batter if you want to push the indulgence level into truly ridiculous territory. Crushed toffee bits on top of the vanilla wafers add a buttery crunch that surprises people in the best way.
Storage and Leftover Strategy
These keep beautifully in an airtight container in the fridge for up to four days, though they rarely last that long in my house. You can also freeze individual squares wrapped tightly in plastic wrap for up to a month.
- Let frozen squares thaw in the fridge overnight rather than microwaving, which makes the pudding layer weep.
- Keep them covered even in the fridge because banana flavors absorb other odors faster than you would expect.
- Always add fresh banana garnish right before serving, never on top of stored squares.
 Save
Save Every time I make these, someone tells me they taste like childhood and adulthood had a delicious compromise, and honestly that is the highest compliment I can imagine for a pan of brownies.
Recipe FAQs
- → How do I create a distinct banana swirl without overmixing?
-
Dollop the banana mixture in large spoonfuls across the brownie batter, then use a knife or skewer to gently pull through a few times. Stop once you see marbled ribbons—overmixing will blend the layers and reduce contrast.
- → Can I use homemade banana custard instead of instant pudding?
-
Yes. Use a thickened custard (reduced milk and egg yolk) so the layer holds its shape; allow it to cool slightly before dolloping to prevent sinking into the brownie batter.
- → How can I tell when the bars are done baking?
-
Bake until the center is just set and a toothpick inserted near the edge comes out mostly clean with a few moist crumbs. The center will continue to firm as the pan cools.
- → What are the best storage and serving practices?
-
Cover and refrigerate for up to 4 days. Chilling yields cleaner slices; bring bars to room temperature before serving for a softer texture. Reheat briefly if you prefer warm portions.
- → How can I make a gluten-free version?
-
Substitute a cup-for-cup gluten-free flour blend in the brownie layer and use certified gluten-free vanilla wafers. Check all packaged ingredients for cross-contamination notes.
- → Any tips for extra chocolate richness?
-
Fold a handful of chocolate chips into the brownie batter before spreading, or sprinkle chopped bittersweet chocolate on top before baking for pockets of melted chocolate.