 Save
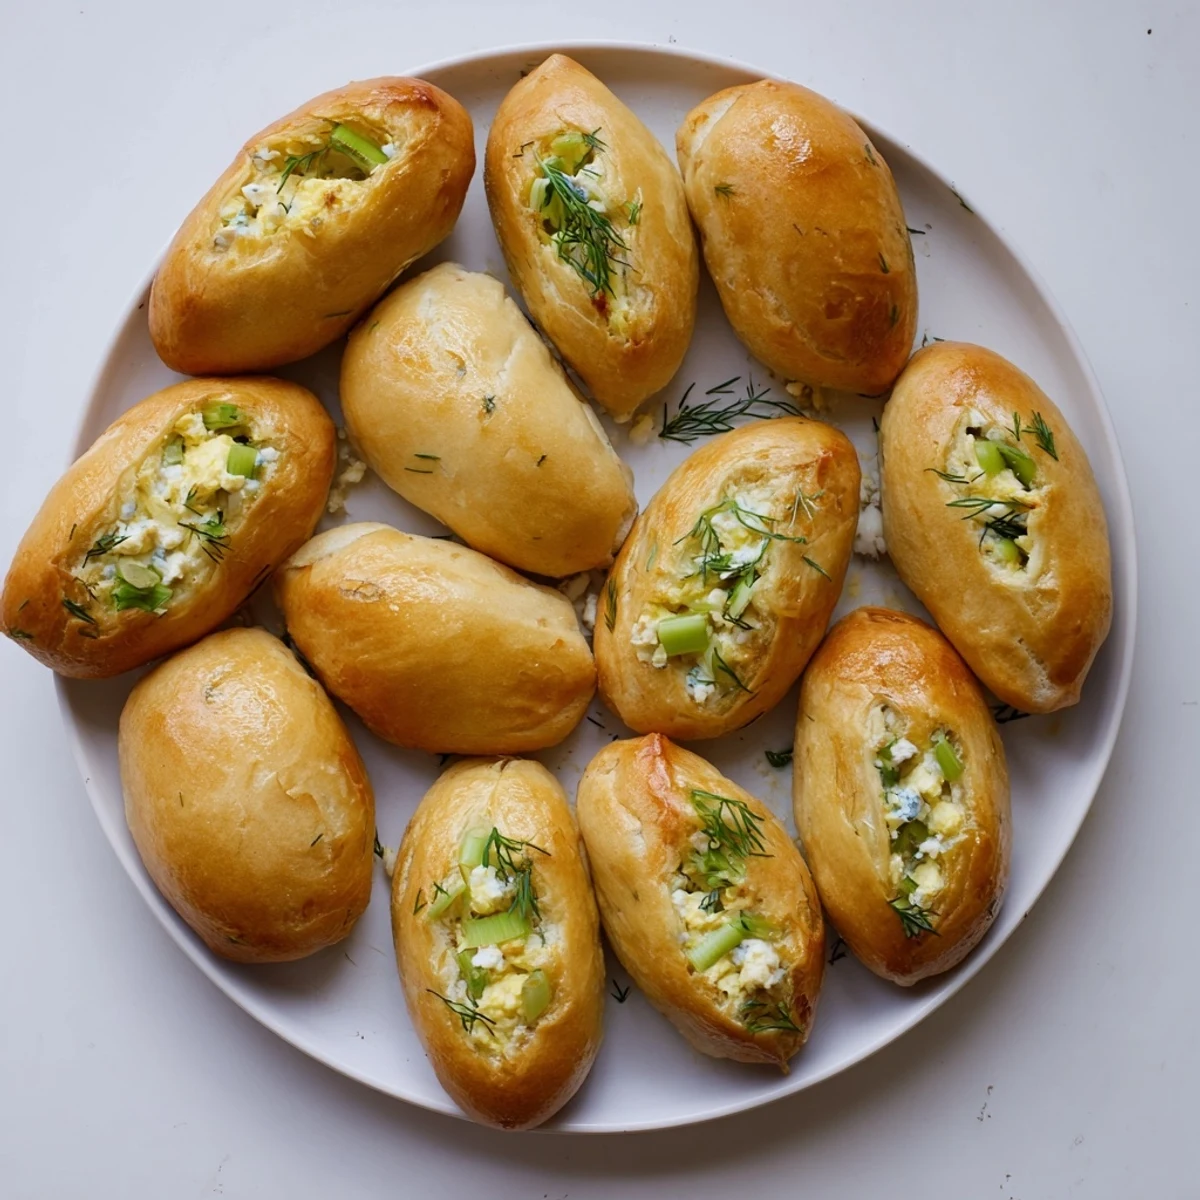
Save These soft, golden handheld pastries feature a traditional Eastern European dough stuffed with a savory blend of hard-boiled eggs, melted mozzarella, tangy feta, and fresh herbs. The yeast-based dough rises to pillowy perfection, creating pockets that seal in the cheesy filling during baking until golden brown.
Ideal for meal prep or serving guests, these portable treats pair wonderfully with sour cream for dipping or a crisp cucumber salad on the side. The combination of protein-rich eggs and flavorful cheeses makes them satisfying enough for lunch yet light enough for snacking.
My grandmother never measured anything when she made piroshki, she just knew by touch when the dough was right. I spent countless afternoons watching her hands work flour and butter into something magical, trying to memorize the rhythm of her motions. These golden pastries became my weekend baking project, filling my tiny apartment with the most incredible yeasty aroma that made neighbors stop by my door. Now they are my go to comfort food, simple enough for a Tuesday but special enough for company.
Last winter I made three dozen of these for a snowed-in gathering of friends. We stood around the kitchen counter eating them warm from the oven, steam rising into the cold air, talking about everything and nothing. Someone mentioned they tasted like something from a European bakery, which made me silently thank my grandmother for teaching me well. That night became a monthly tradition, piroshki Friday, where we all take turns filling and sealing the little dough pockets.
Ingredients
- 3 cups all purpose flour: The foundation of the dough, providing structure and that perfect tender crumb
- 1 cup warm milk: Creates a softer, more delicate dough than water alone
- 1 packet active dry yeast: Essential for the fluffy, pillowy texture that makes these so addictive
- 2 tbsp sugar: Feeds the yeast and adds just a hint of sweetness to balance the savory filling
- 1/2 tsp salt: Enhances all the flavors and keeps the dough from tasting flat
- 2 tbsp unsalted butter, melted: Adds richness and helps create that beautiful golden crust
- 1 large egg: Enriches the dough structure and contributes to browning
- 4 large hard boiled eggs, chopped: The heart of the filling, providing creaminess and substance
- 1 1/2 cups shredded mozzarella cheese: Melts into gorgeous stretches that pull apart when you bite in
- 1 cup crumbled feta cheese: Brings a tangy, salty contrast that wakes up your palate
- 1/4 cup chopped fresh dill: Brightens the rich filling with its fresh, grassy flavor
- 1/4 cup chopped green onions: Add mild onion flavor and pretty flecks of color throughout
- 1/4 tsp ground black pepper: Provides a subtle warmth that lingers pleasantly
- 1/4 tsp salt: Just enough to season the filling without overpowering the cheeses
- 1 large egg, beaten: Creates that gorgeous glossy, golden finish on the baked pastries
Instructions
- Wake up the yeast:
- Dissolve sugar in warm milk, then sprinkle yeast on top and let it bubble up for 5 to 10 minutes until foamy and alive.
- Make the dough:
- Combine flour and salt in a large bowl, then pour in melted butter, one egg, and the activated yeast mixture, mixing until everything comes together.
- Knead and rise:
- Turn dough onto a floured surface and knead for 7 to 8 minutes until smooth and elastic, then place in a greased bowl, cover, and let rise in a warm spot for about 1 hour until doubled.
- Prepare the filling:
- While dough rises, mix chopped hard boiled eggs, mozzarella, feta, dill, green onions, pepper, and salt until evenly combined.
- Heat the oven:
- Preheat to 375°F and line a baking sheet with parchment paper so nothing sticks.
- Divide the dough:
- Punch down the risen dough and divide into 12 equal balls, keeping them covered so they do not dry out.
- Roll and fill:
- Roll each ball into a 4 inch circle, place 2 tablespoons of filling in the center, and prepare to seal.
- Shape the piroshki:
- Fold dough over filling to form a half moon or oval, then pinch edges tightly to seal in all that cheesy goodness.
- Egg wash and arrange:
- Place piroshki seam side down on the prepared baking sheet and brush each with beaten egg for that gorgeous golden finish.
- Bake to perfection:
- Bake for 20 to 25 minutes until deeply golden brown and the cheese inside is melted and bubbly.
 Save
Save The first time I served these at a potluck, they disappeared so fast I barely got one myself. Someone asked for the recipe three times during the party because they could not believe these were homemade. Now I double the batch whenever there is any kind of gathering, because I have learned the hard way that twelve is never enough.
Making Ahead
I often assemble the piroshki the night before and refrigerate them on the baking sheet, covered tightly with plastic wrap. Let them sit at room temperature for 30 minutes before baking to take the chill off. This works brilliantly for brunch or unexpected guests.
Freezing Instructions
These freeze exceptionally well either before or after baking. For unbaked, freeze on a tray then transfer to bags and add 5 minutes to baking time. For already baked, just reheat in a 350°F oven for 10 minutes until warm and crisp again.
Serving Suggestions
While perfectly delicious on their own, piroshki love company. A bowl of cold sour cream on the side makes every bite even more luxurious. A crisp cucumber salad with a simple vinegar dressing cuts through the richness beautifully.
- Sprinkle some flaky sea salt on top right after baking for extra texture
- Try adding chopped fresh parsley or chives if dill is not your favorite
- These reheat surprisingly well in a toaster oven for quick weekday lunches
 Save
Save There is something profoundly satisfying about biting into warm, flaky pastry filled with gooey cheese and creamy eggs. I hope these become a beloved tradition in your kitchen too.
Recipe FAQs
- → What makes piroshki dough different from regular pastry dough?
-
Piroshki uses a yeast-based dough similar to bread, which creates a soft, pillowy texture that rises during baking. Unlike flaky pastry dough, this version remains tender and chewy while becoming golden on the outside.
- → Can I make these ahead of time?
-
Yes, you can prepare the filling and dough a day in advance. Store them separately in the refrigerator. Alternatively, bake fully and freeze for up to 3 months, then reheat in a 350°F oven for 10-15 minutes.
- → What other fillings work well?
-
Traditional options include mashed potatoes with caramelized onions, ground meat with rice, sauerkraut, or cottage cheese. The egg and cheese filling is particularly popular as a vegetarian option that still provides substantial protein.
- → Why do I need to boil eggs before adding to filling?
-
Pre-cooking the eggs ensures they're fully cooked and safe to eat after the relatively short baking time. Raw eggs would require longer baking that might overcook the dough or cause the filling to become watery.
- → How do I know when the dough has risen enough?
-
The dough is ready when it has doubled in size and a finger pressed into the surface leaves an indentation that slowly springs back. This usually takes about 1 hour in a warm, draft-free spot.
- → Can I freeze unbaked piroshki?
-
Yes, assemble and freeze on a baking sheet until solid, then transfer to a freezer bag. Bake from frozen, adding 5-10 minutes to the baking time. Brush with egg wash just before baking for best results.