 Save
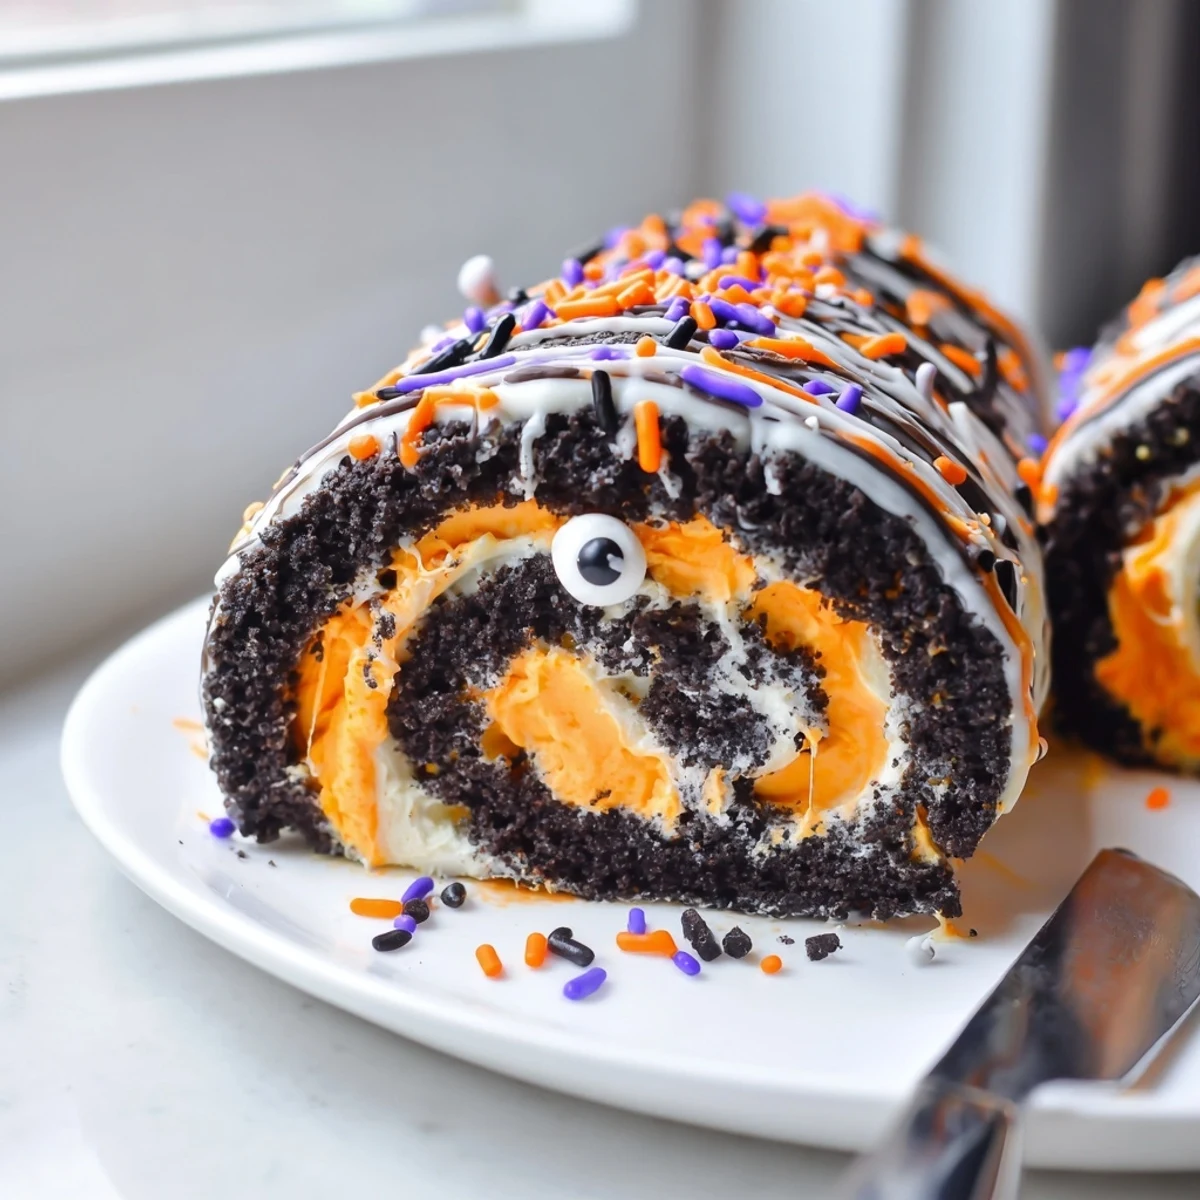
Save Whip up this showstopping Halloween dessert that combines crushed Oreos with a vibrant orange whipped cream filling. The entire treat comes together in just 25 minutes of active prep time, then chills until firm. The chocolatey cookie base pairs perfectly with the light, colored cream, while festive sprinkles and optional candy eyes make it irresistibly spooky. Slice into rounds to reveal the swirled Halloween colors inside—guaranteed to impress at any autumn gathering.
The rain was pounding against my kitchen window last October when I decided to experiment with those limited edition Halloween Oreos I'd been hoarding. My daughter was having a few friends over for a scary movie marathon, and I wanted something that felt special without spending hours in the kitchen. This roll came together so effortlessly that I actually laughed out loud when I realized how impressive it looked with minimal effort.
My kitchen looked like a confetti bomb had gone off after the decorating phase, but watching the kids' eyes light up when I brought out this swirled creation made every sprinkle worth it. One of them actually asked if I'd ordered it from a bakery.
Ingredients
- 36 Halloween Oreos: The cream filling in these already has that orange tint, but regular Oreos work perfectly fine too if you add food coloring later
- 1 cup powdered sugar: This sweetens the crust just enough without making it cloying
- 6 tbsp unsalted butter, melted: Let it cool slightly before mixing so it doesn't melt the cream cheese prematurely
- 4 oz cream cheese, softened: Room temperature is non negotiable here or you'll end up with lumps in your cookie base
- 1 cup heavy whipping cream: Chill your bowl and whisk beforehand for faster, more stable peaks
- 1/4 cup powdered sugar: Dissolves better than granulated in cold cream
- 1 tsp vanilla extract: Pure vanilla makes such a difference in simple desserts
- Food coloring: Gel colors work best without thinning out your whipped cream
- Halloween sprinkles: The more colors and shapes, the better
- Candy eyes: These turn your elegant roll into something delightfully creepy
Instructions
- Prepare your workspace:
- Line a large baking sheet with parchment paper, making sure it overhangs the edges. This paper will become your best friend when rolling the log later.
- Make the cookie base:
- Pulse those Oreos into fine crumbs, then mix with powdered sugar, melted butter, and cream cheese. The dough should feel like playdough, holding together when you squeeze it.
- Roll it out:
- Place the dough between two sheets of parchment and roll to about half inch thick. Don't stress about perfect rectangle edges. Take your time lifting the parchment to prevent sticking.
- Whip the filling:
- Beat that cold heavy cream with powdered sugar and vanilla until you have stiff peaks that stand up proudly. Gently fold in food coloring until you reach your desired shade.
- Spread and roll:
- Spread the colored cream over your cookie base, leaving that one inch border bare. Use the parchment paper to lift and roll from the long edge without filling, rolling tightly but gently.
- Chill thoroughly:
- Wrap the log securely and refrigerate for at least one hour. This firming up period is what gives you clean slices instead of a squished mess.
- The grand finale:
- Decorate with melted chocolate, sprinkles, and candy eyes right before serving. Use a sharp knife and saw gently through the roll for the prettiest spirals.
 Save
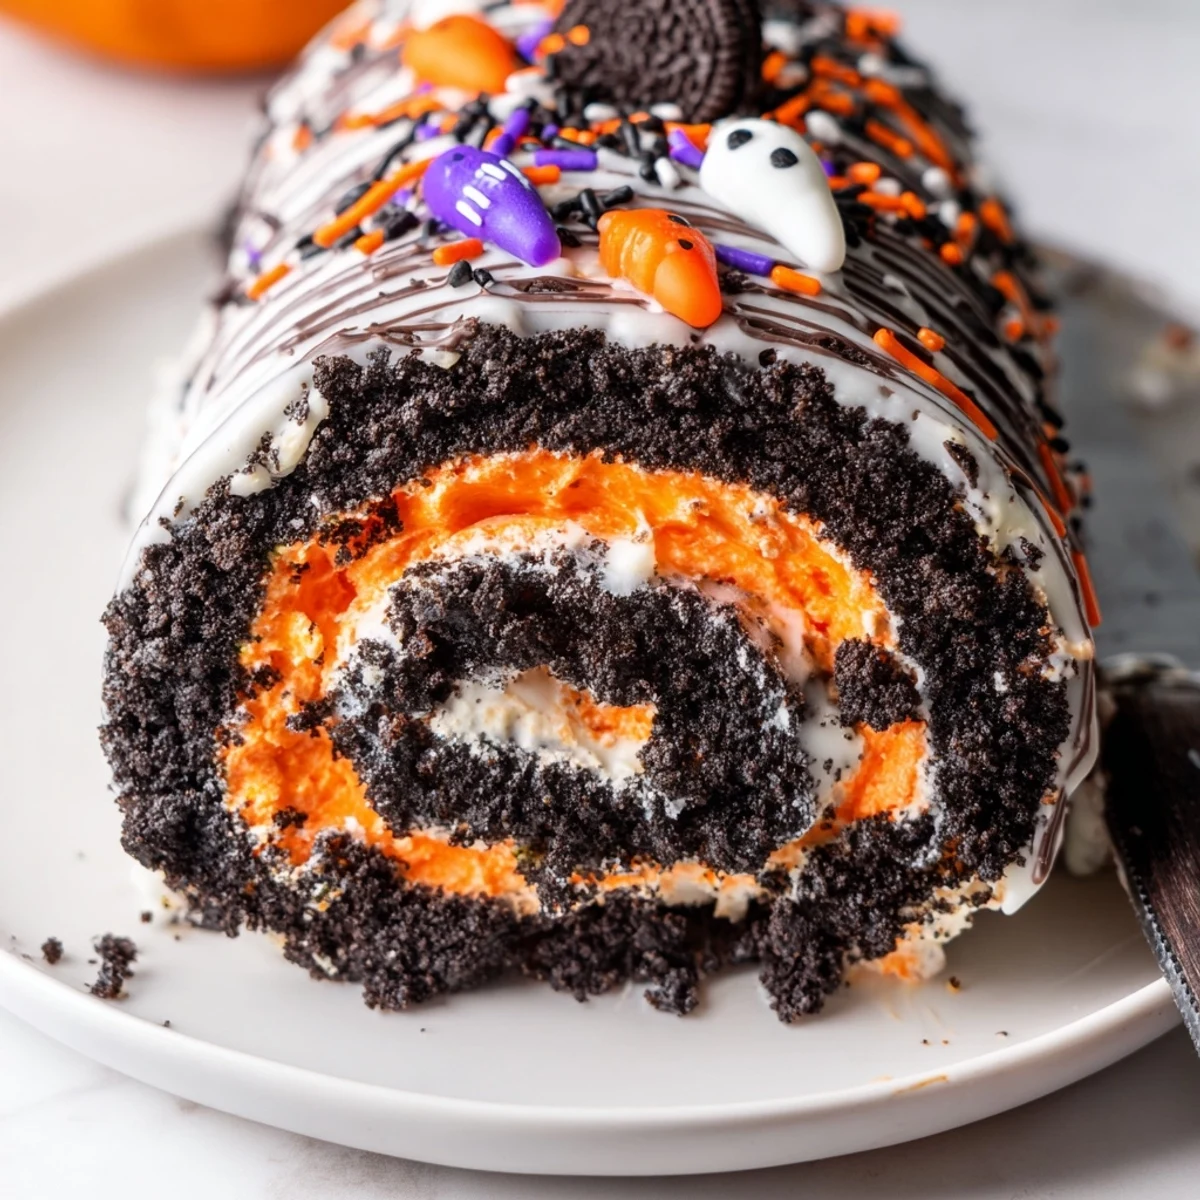
Save Last year I made three of these rolls for different Halloween gatherings and each time, someone asked for the recipe before they even finished their first slice. Something about that spiral pattern just makes people happy.
Making Ahead
You can prepare the entire roll up to 24 hours in advance. Just wrap it tightly in plastic wrap after the initial chill. Add decorations no more than two hours before serving or the sprinkles might start bleeding into the cream.
Flavor Variations
Try adding a teaspoon of orange zest to the whipped cream for brightness. A pinch of cinnamon in the cookie base creates warmth that pairs beautifully with the chocolate cookies. Peppermint extract turns this into a holiday roll for December.
Serving Suggestions
This dessert shines when served slightly cold. The contrast between the firm cookie crust and the silky cream filling is at its best straight from the refrigerator.
- Use a warm knife wiped clean between slices for the cleanest cuts
- Arrange slices on a platter with extra candy scattered around
- Pair with a glass of cold milk or a cup of hot cocoa
 Save
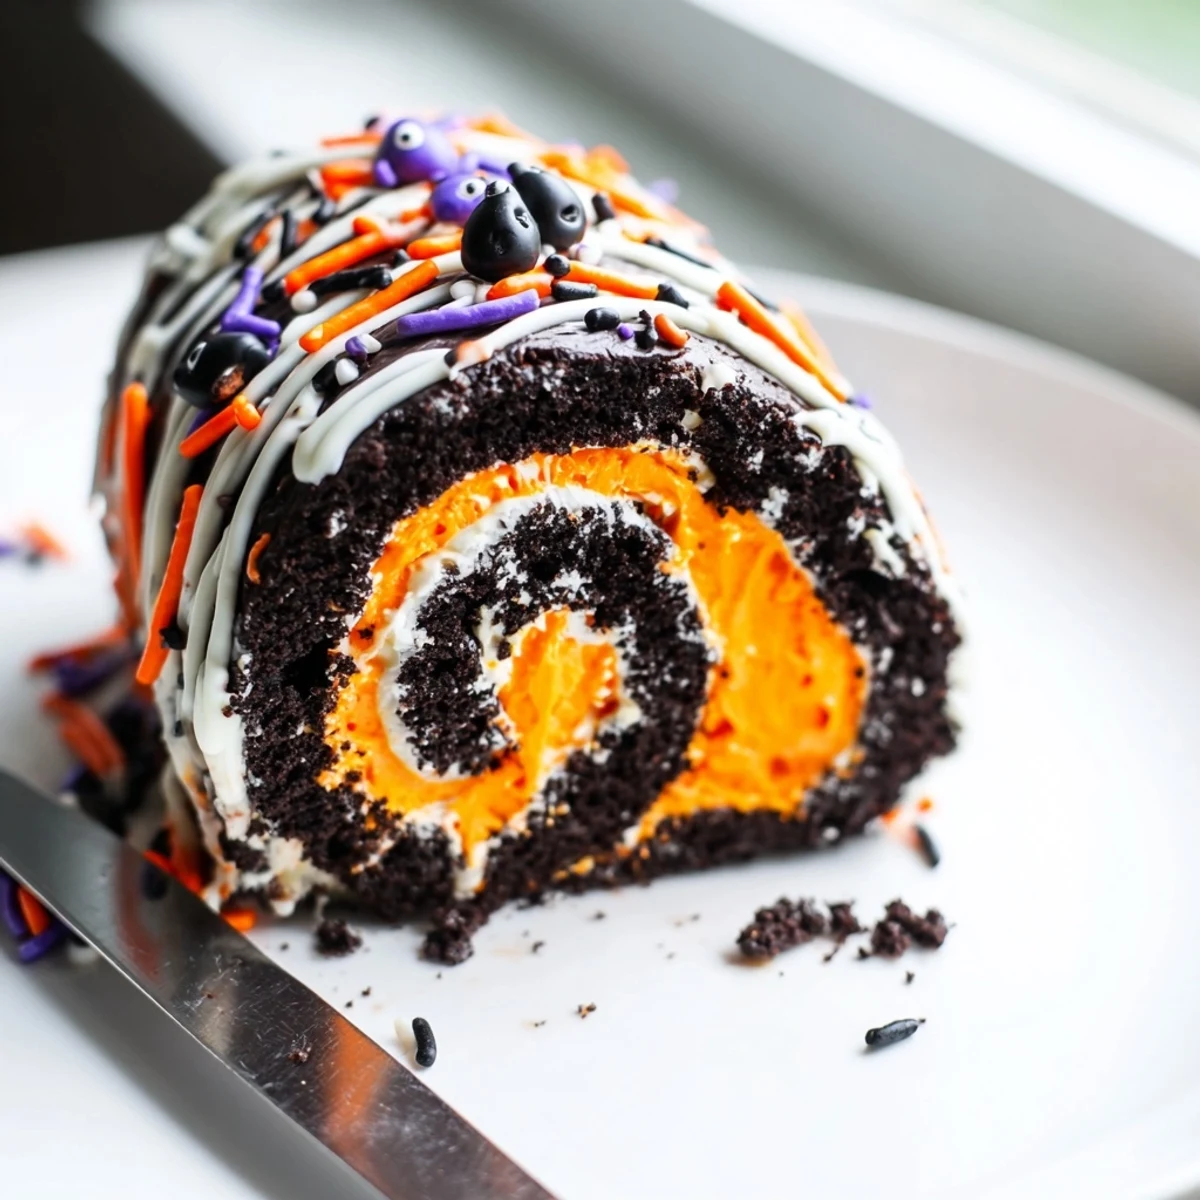
Save There's something magical about cutting into that spiral and seeing the orange cream against the dark cookie. Halloween doesn't get much sweeter than this.
Recipe FAQs
- → How far in advance can I make this?
-
You can prepare the Oreo roll up to 24 hours ahead. Keep it well-covered in the refrigerator until ready to serve. Add decorations like sprinkles and chocolate drizzle shortly before serving for the freshest appearance.
- → Can I use regular Oreos instead of Halloween ones?
-
Absolutely! Regular Oreos work perfectly. Simply add orange or purple food coloring to the whipped cream filling to achieve the festive Halloween look. You can also tint the cookie base with a few drops of coloring if desired.
- → Why did my roll crack when slicing?
-
Chilling thoroughly is key—at least one hour, but longer is better. Use a sharp knife and clean it between slices for smooth cuts. If the filling is too soft, it can cause cracking, so ensure stiff peaks when whipping the cream.
- → Can I freeze this dessert?
-
Yes! Wrap the chilled roll tightly in plastic wrap, then foil, and freeze for up to 1 month. Thaw overnight in the refrigerator before serving. Add fresh decorations after thawing for the best presentation.
- → What other decorations work well?
-
Candy corn, crushed pumpkin-shaped cookies, edible glitter, or themed sprinkles all look fantastic. A spiderweb design made with melted chocolate piped on top adds an extra spooky touch. Get creative with your favorite Halloween candies!
- → How do I get clean slices?
-
Chill your roll thoroughly—at least 1 hour, but longer is even better. Use a sharp knife and wipe it clean between each slice. For picture-perfect rounds, you can dip the knife in hot water and dry it between cuts.