 Save
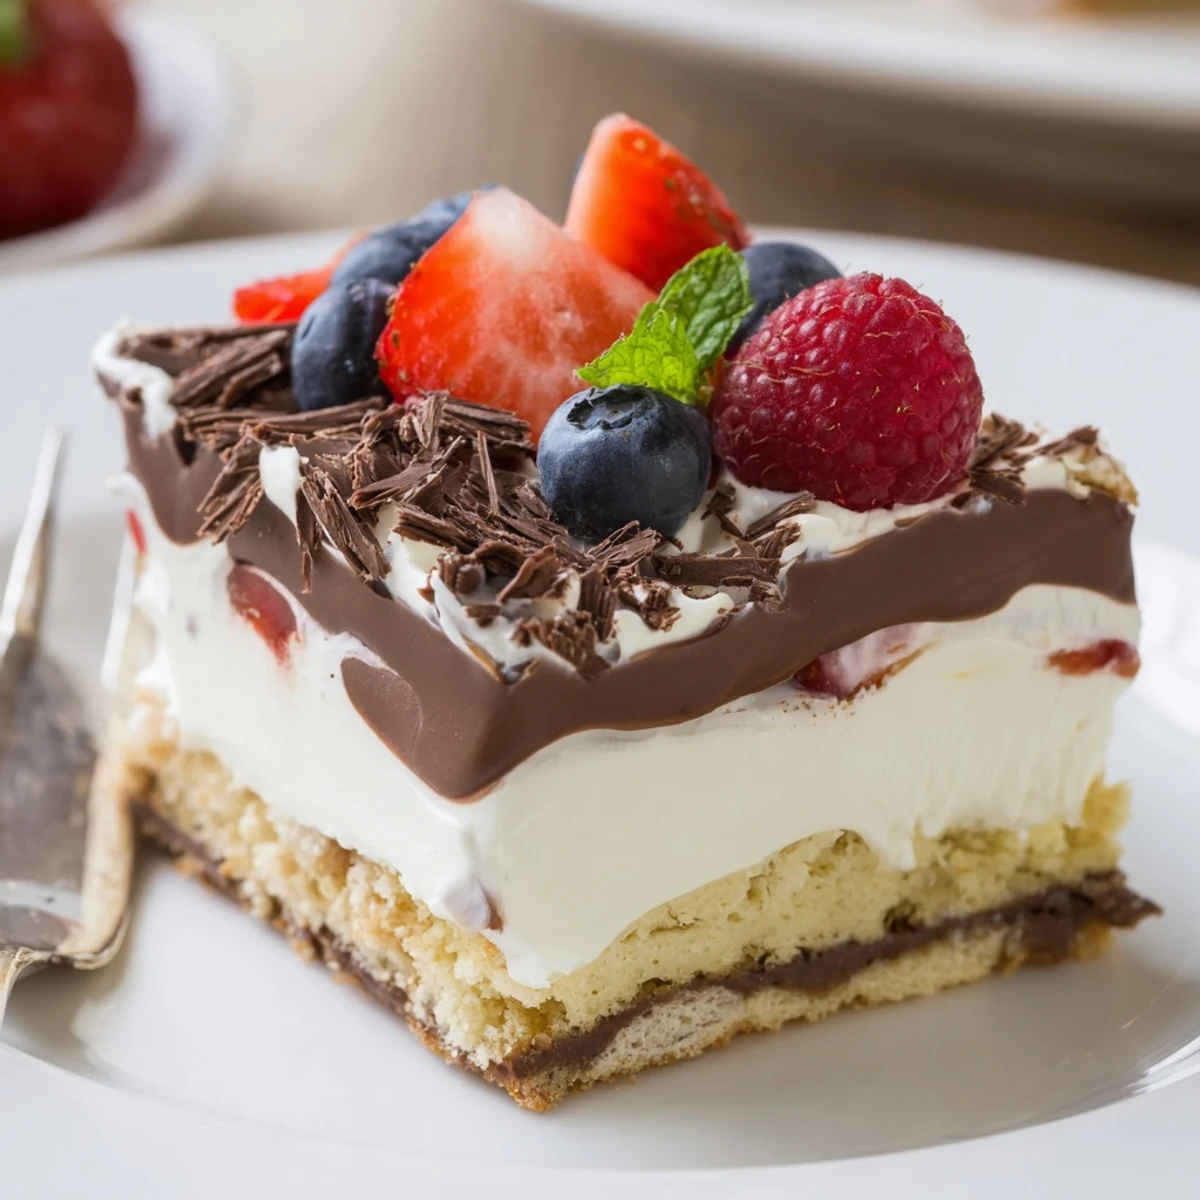
Save A multi-layered dessert built on a crushed biscuit base, topped with a glossy dark chocolate ganache and a whipped mascarpone-vanilla cream. Chill the base, set the ganache briefly, spread the vanilla layer and refrigerate until firm. Finish with macerated mixed berries and chocolate shavings. Best sliced with a warm knife and can be made ahead and chilled overnight.
When I first set out to layer chocolate, vanilla, and berries in one dessert, it was raining so hard that the patter on my kitchen window felt like my own personal drumroll. The promise of something decadent was enough motivation to turn on some music and fill the house with the smells of melting chocolate and fresh berries. I remember laughing at my reflection, chocolate smudged across my cheek, as I assembled each layer. It felt like building an edible celebration, one ingredient after another.
I still grin thinking about the time I surprised my friends with this dessert at a cozy weekend dinner—every forkful was followed by that little silence when everyone just wants one more bite. Watching the vanilla cream mingle with the chocolate ganache on my friend's plate, I realized how much these flavors mean gathered around a table. There’s something about sharing a slice that bonds you in a small but memorable way.
Ingredients
- Digestive biscuits: Use your favorite brand for a dependable crunch—I now pulse mine a little extra so the base is like sweet sand.
- Unsalted butter: Letting the butter cool a bit before mixing avoids greasy patches in the crust, trust me.
- Dark chocolate: Try for 60-70% cocoa, so the ganache is bold without being bitter.
- Heavy cream: Whipping cream by hand once made me appreciate the soft peaks that seem to appear the moment you look away.
- Mascarpone: I learned mascarpone makes the cream layer impossibly smooth—don’t skip softening it first.
- Powdered sugar: Sifting keeps lumps out and joys in.
- Vanilla extract: Splurge on real extract; a little goes a long way.
- Mixed berries: I pick whatever looks juiciest—a scatter of strawberries, raspberries, blueberries always looks inviting.
- Sugar and lemon juice: Tossed with fruit, these bring all the fresh flavors into harmony.
- Chocolate shavings and fresh mint: Optional, but shaving chocolate yourself feels like a finishing flourish worthy of applause.
Instructions
- Prep the Pan:
- Line your springform pan with parchment paper—the crinkle as you press it in means easy release later.
- Craft the Biscuit Base:
- Crush biscuits to fine crumbs, stir into melted butter, and press down firmly; it should feel like damp beach sand under your fingers. Pop it in the fridge so it sets while you get on with the next layer.
- Make the Ganache:
- Gently heat cream until it trembles, then pour over chocolate and wait—let the warmth melt everything before stirring in butter to glossy perfection. Spread this chocolatey stream over the biscuit base, then return to the fridge for a short set.
- Whip Up the Vanilla Cream:
- Beat mascarpone, cream, sugar, and vanilla until thick, resisting the urge to taste test every few seconds. Gently layer over the set ganache so you keep those lovely tidemarks.
- Top with Fruit:
- Toss berries with a little sugar and lemon; the moment they glisten, mound them high. It’ll look like a burst of summer tumbling over your cake.
- Garnish & Serve:
- Shave chocolate on top, add mint if you like, then gently unclasp the pan—the moment of truth. Slice confidently; all those layers were worth it.
 Save
Save The first time my niece looked up at me, her face berry-stained with a huge smile, I realized this dessert was now part of our family’s greatest hits. Somehow, making it for someone else always makes it feel like a gift and not just a recipe.
Choosing Your Layers
There was a Sunday afternoon when I tried swapping out vanilla for espresso in the cream and it instantly became a grown-up treat. Sometimes I go heavier on the berries to lighten up the overall flavor, especially for summer gatherings. Experimenting with the order of the layers even made for a fun kitchen debate—or at least a good excuse to make it again.
Layering Like a Pro
I learned it matters more than I thought: using a spatula for the cream layer means gentle hands make neater lines. If you’re feeling artistic, swirl the top of the cream before adding fruit for a new twist every time. I never tire of peeking at those stripes when you slice into it.
Serving and Storage Secrets
Leftovers keep well for a day or two, just cover tightly so the fruit stays fresh. If you have a warm kitchen, chill your knife before slicing for the sharpest lines. I always serve with tiny plates—it’s rich, and a little goes a long way.
- Let the dessert sit at room temp for 10 minutes to soften before serving.
- Don’t assemble fruit topping too far ahead to avoid soggy layers.
- Garnish right before presentation for max impact.
 Save
Save Every time you slice into this showstopper, it’s a mini celebration all over again. Here’s to desserts that always earn a second helping and a roomful of happy sighs.
Recipe FAQs
- → How do I get a firm biscuit base?
-
Pulse digestive biscuits to fine crumbs and combine thoroughly with melted butter. Press firmly into the pan and chill for at least 20 minutes so the base compacts and holds together when sliced.
- → What chocolate works best for the ganache?
-
Use good-quality dark chocolate (around 55–70% cocoa) for a rich, glossy ganache. Chop evenly so the cream melts it uniformly and stir until smooth off the heat for a silky finish.
- → How can I prevent the mascarpone layer from becoming grainy?
-
Beat mascarpone gently with cold cream and powdered sugar; avoid overbeating which can cause separation. Use chilled utensils and fold until smooth and thick rather than whisking at high speed.
- → Any tips for preparing the berry topping?
-
Toss mixed berries with a tablespoon of sugar and a little lemon juice to macerate and release juices. Spoon them gently over the cream layer so the topping stays bright and avoids sinking into the layers.
- → Can this be made ahead and how should it be stored?
-
Yes — assemble and chill overnight for best flavor development. Keep covered in the fridge and remove an hour before serving for slightly softer slices. Store leftovers refrigerated up to 3 days.
- → How do I adapt this for gluten-free needs?
-
Replace digestive biscuits with a certified gluten-free crumb or toasted gluten-free cookies. Ensure any chocolate or packaged ingredients are labeled gluten-free to avoid cross-contamination.