 Save
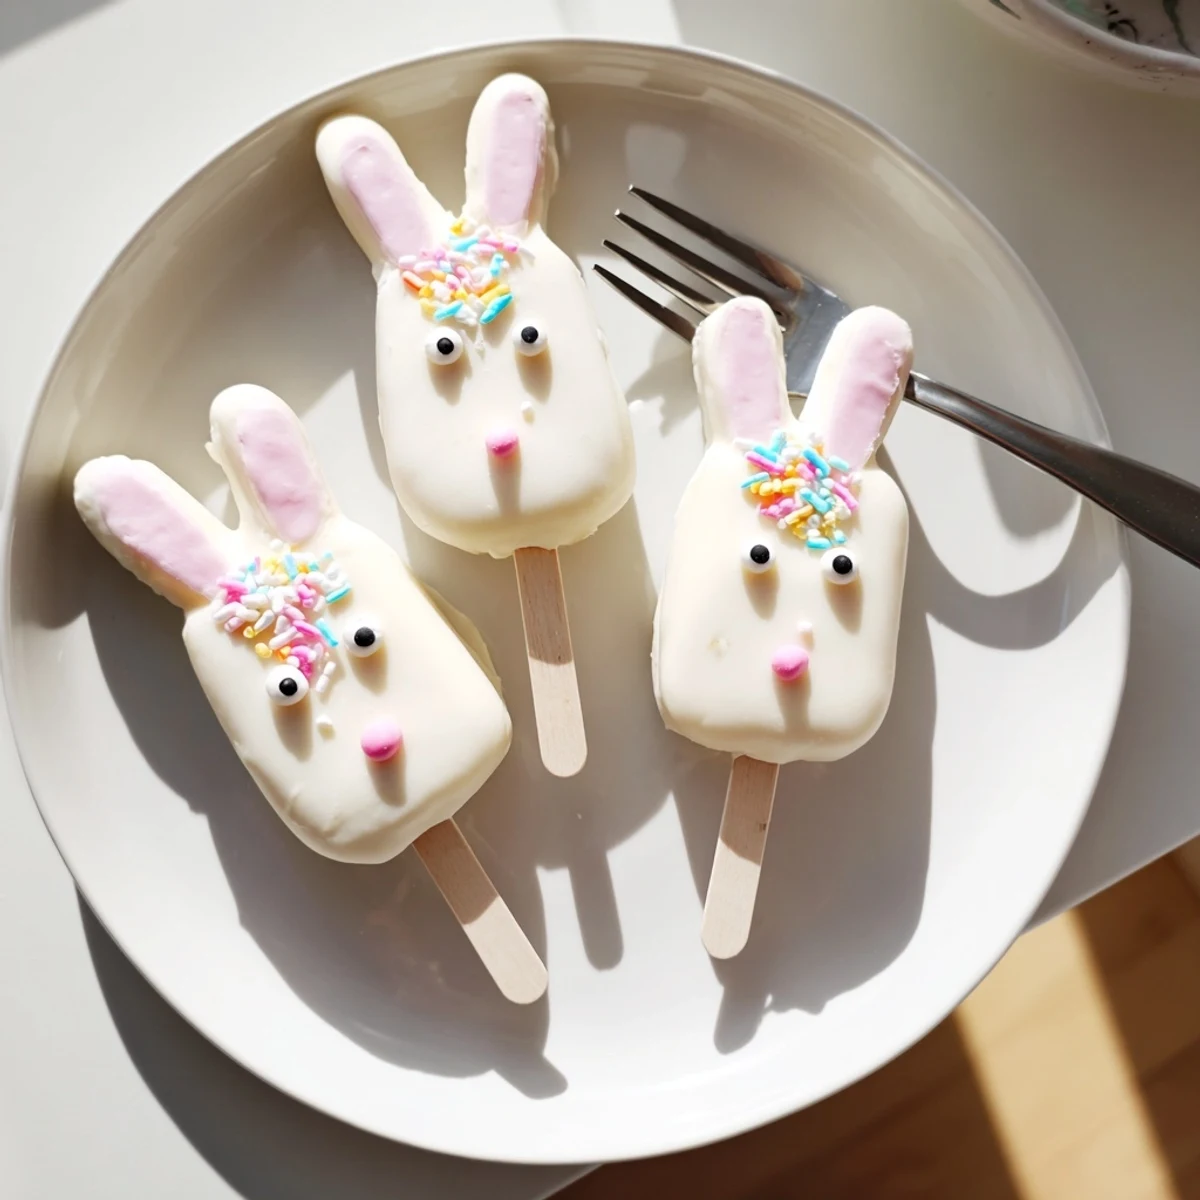
Save These delightful bunny cakesicles transform simple cake crumbs and cream cheese into festive Easter treats. The moist vanilla center gets coated in smooth white chocolate, then decorated with candy faces, colorful sprinkles, and fondant ears to create adorable edible bunnies.
Perfect for spring celebrations, these handheld desserts take about an hour from start to finish. The dough-like mixture shapes easily into bunny faces, holds securely on sticks, and sets beautifully when dipped in melted chocolate. Kids will love helping decorate with candy eyes, pink noses, and colorful ears.
Store extras in the refrigerator for up to three days, or make them ahead for Easter brunch, classroom parties, and family gatherings. The white chocolate coating stays perfectly smooth, while decorations add charming personality to each festive bunny.
My kitchen counter looked like a pastel explosion last Easter, with powdered sugar dusting everything and little bunny-shaped treats lining the windowsill. My youngest declared these cakesicles 'the best thing that ever happened to dessert' and proceeded to eat two before dinner. There's something magical about turning humble cake crumbs into something that makes both kids and adults light up with genuine joy.
I first attempted these during a rainy weekend baking marathon with my niece, who insisted we needed 'something bunny shaped' for the family gathering. We made such a mess decorating with candy eyes and pink noses that chocolate ended up smeared on our noses and cheeks too. Everyone at Easter brunch pretended not to notice the slightly lopsided ears, but they disappeared faster than anything else on the table.
Ingredients
- Vanilla cake crumbs: These form the base of your cakesicles so save that slightly stale cake or leftover cupcakes because they actually work better than fresh
- Cream cheese and butter: The secret binding agents that hold everything together while adding that luxurious richness people will ask about
- Powdered sugar: Just enough to sweeten the mixture without making it cloyingly sweet since the chocolate coating adds plenty of sweetness
- Vanilla extract: Pure vanilla makes all the difference here since the flavor shines through the white chocolate
- White chocolate melts: These create that gorgeous smooth coating and unlike chocolate chips they are specifically formulated to melt beautifully and harden properly
- Cakesicle sticks: Essential for the cakesicle experience and make these so much easier to dip and eat than traditional cake pops
- Decorations: Candy eyes and pink food coloring turn simple treats into recognizable bunnies that will delight everyone
Instructions
- Mix the cake base:
- Combine your cake crumbs with softened cream cheese butter powdered sugar and vanilla until everything comes together into a smooth pliable dough that you can shape without falling apart.
- Shape your bunnies:
- Portion the mixture into eight equal pieces and gently flatten each into an oval bunny face shape inserting the sticks carefully into the bottom.
- Chill until firm:
- Place your shaped bunnies in the refrigerator for at least twenty minutes because skipping this step will cause heartbreak when they fall apart in the melted chocolate.
- Melt the coating:
- Heat your white chocolate in thirty second intervals stirring between each burst until you have that silky smooth consistency that coats everything evenly.
- Dip and decorate:
- Working quickly dip each cakesicle into the chocolate tap off the excess and immediately add those cute bunny features while the coating is still soft.
- Set and serve:
- Let them harden at room temperature or pop them in the fridge for faster setting then watch your guests faces light up when you bring out the tray.
 Save
Save These became an instant tradition after my sister requested them for her baby shower and we made pink and blue bunnies to announce the gender. Now every Easter my nephew asks if we are making the bunny pops again and helps me press the candy eyes onto each face with serious concentration. The best part is watching reluctant dessert eaters light up when they see these adorable treats peeking out from behind all the other desserts.
Perfecting the White Chocolate
After several batches of streaky lumpy coating I learned that patience with melting chocolate makes all the difference. Use a microwave safe bowl and stir thoroughly between each thirty second interval even if the chocolate still looks solid because it holds its shape longer than you expect. The silky smooth finish is worth every extra second of careful melting.
Making Them Ahead
You can shape and chill the bunny bases up to two days before your event storing them tightly wrapped in the refrigerator. The dipping and decorating should happen the day of serving because the white chocolate can develop those unappetizing gray streaks and lose its glossy sheen after too long. Trust me fresh dipped cakesicles taste and look significantly better than ones that have been sitting around.
Decoration Ideas That Wow
Beyond basic candy eyes try dipping the ears in pink shimmer dust for an enchanted forest bunny look or use contrasting chocolate to create speckled Easter egg patterns. Some of my most successful variations included drizzling milk chocolate over the white coating for a marbled effect and pressing pastel sprinkles into just the bottom half like little bunny tails.
- Keep a clean toothbrush handy for flicking speckles of food coloring gel
- Work with one cakesicle at a time once the chocolate starts setting it becomes too late to add decorations
- Set up your decorating station before you start dipping so you can work quickly and confidently
 Save
Save These bunny cakesicles have become the most requested Easter treat in my family and I love how they turn simple cake scraps into something that feels special and celebratory. Hope they bring as much joy to your Easter table as they have to ours.
Recipe FAQs
- → What are cakesicles made of?
-
Cakesicles combine cake crumbs mixed with cream cheese, butter, powdered sugar, and vanilla extract to create a dough-like mixture. This mixture gets shaped, chilled, then dipped in melted white chocolate for a smooth, sweet coating.
- → How long do bunny cakesicles stay fresh?
-
Store finished cakesicles in an airtight container in the refrigerator for up to three days. The white chocolate coating protects the moist cake center, keeping them fresh and ready to enjoy.
- → Can I use different cake flavors?
-
Absolutely! While vanilla cake crumbs work beautifully, try chocolate, lemon, red velvet, or strawberry cake for variety. The creamy white chocolate coating complements any cake flavor you choose.
- → Do I need a special mold for cakesicles?
-
No mold required. Shape the mixture by hand into bunny faces or ovals. A cakesicle mold can help with uniform shapes, but hand-shaping works perfectly fine for these festive treats.
- → What decorations work best for bunny faces?
-
Candy eyes, pink fondant noses, sprinkles, and edible gel coloring create charming bunny expressions. Fondant or modeling chocolate make excellent ears, while pretzel sticks add cute whiskers.
- → Can I make these ahead for Easter?
-
Yes, prepare these up to three days before your celebration. The chocolate coating protects the cake center, and decorations stay fresh when stored properly in the refrigerator.