 Save
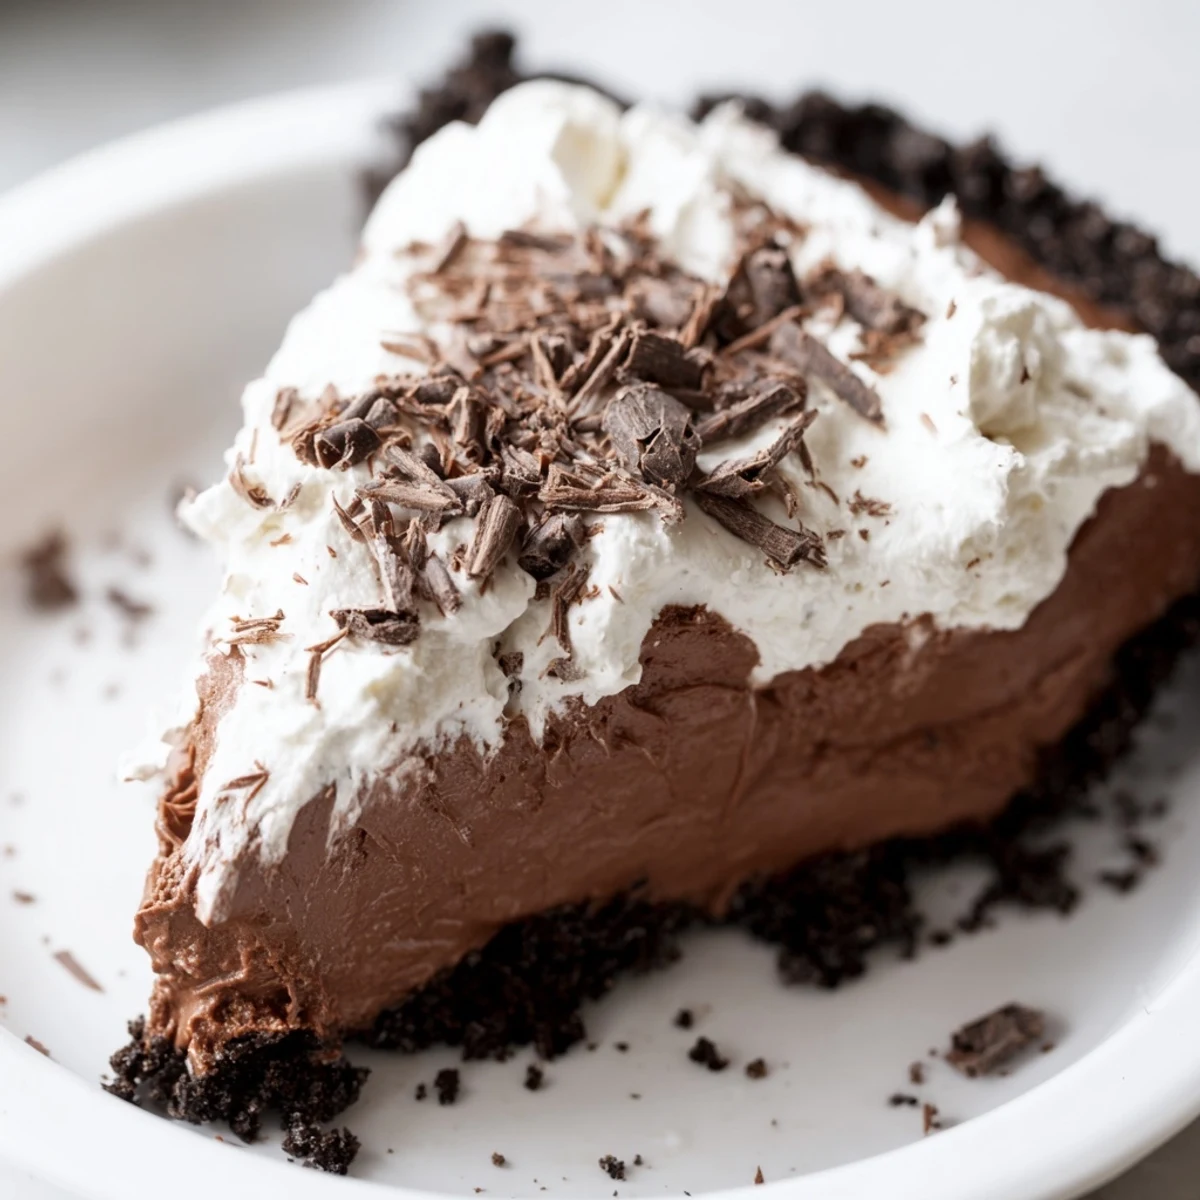
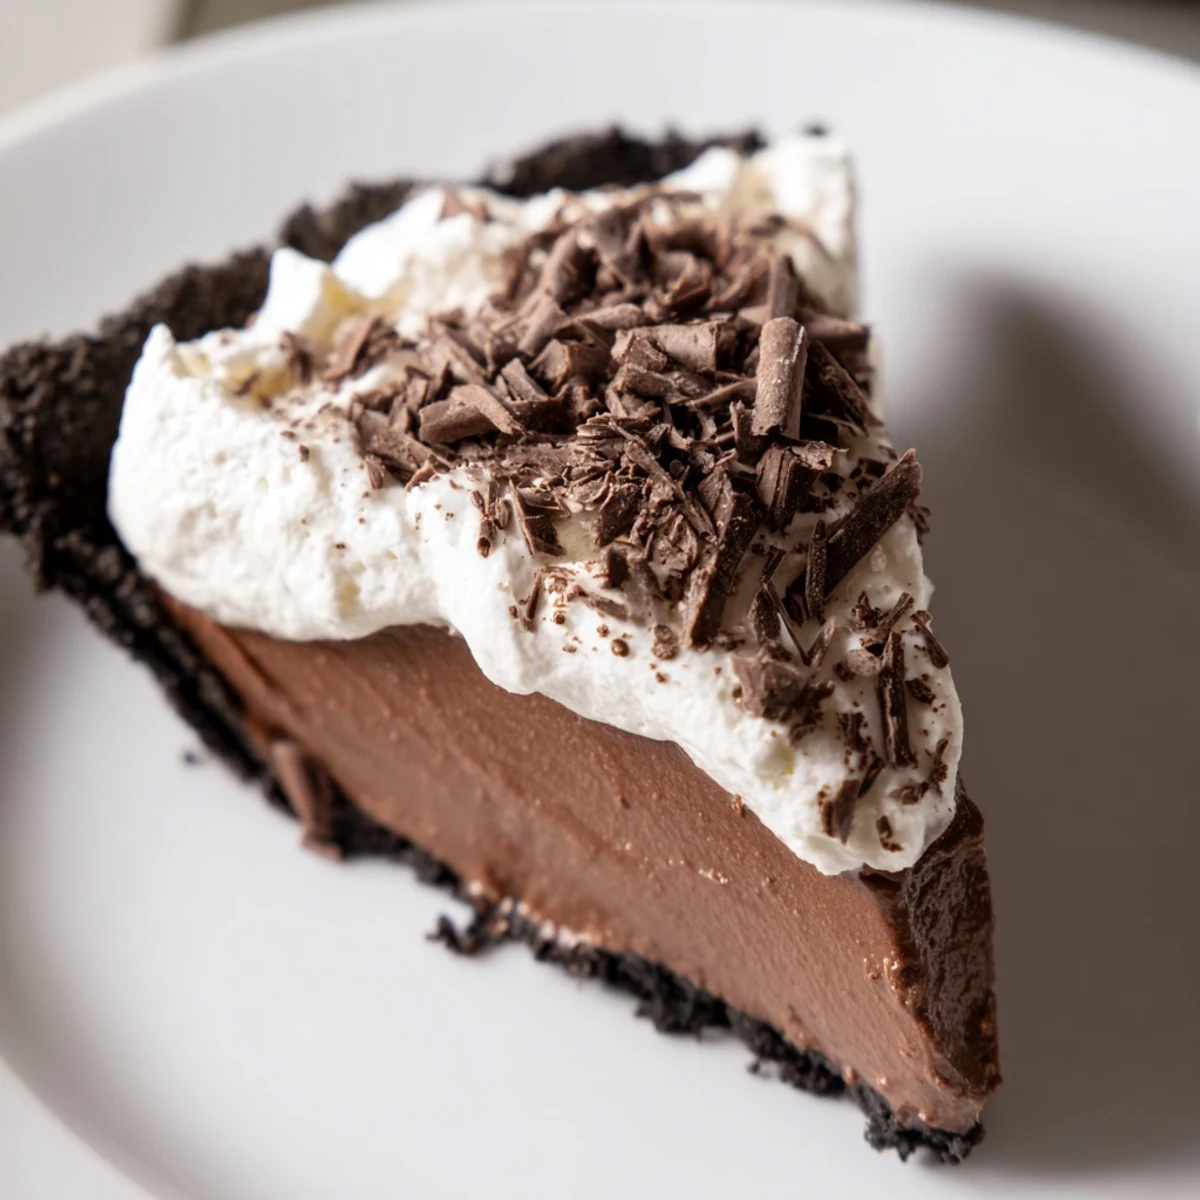
Save This dessert features a silky smooth chocolate filling poured into a crisp chocolate cookie crust, baked briefly, then chilled to set. The rich filling blends melted bittersweet chocolate, butter, sugar, vanilla, and eggs whipped to a light, airy texture. Topped with softly whipped cream sweetened with powdered sugar and vanilla, it’s finished with optional chocolate shavings. Perfect for serving chilled after at least 4 hours preparing time. Ideal for those craving a creamy, indulgent chocolate treat with a delicate crust.
The first time I attempted a silk pie, I stood in my kitchen watching the clock, convinced that beating eggs for five minutes each was some kind of culinary exaggeration. My arm grew tired, the mixer warmed up against my palm, but I kept going because my grandmother had whispered that patience is what separates good desserts from the ones people talk about years later. When that first slice hit my fork, impossibly smooth and holding its shape like a chocolate dream, I understood why she saved this recipe for special occasions.
I brought this to a dinner party last winter, watching snow fall outside while inside, forks scraped against china plates in perfect rhythm. My friend Sarah, who claims she doesnt even like dessert that much, went back for seconds and then hovered near the counter until I finally laughed and told her to take the last slice home. Thats the thing about this pie, it creates converts.
Ingredients
- 200 g chocolate wafer cookies: These create a crust thats somewhere between cookie and candy, and crushing them is oddly therapeutic.
- 60 g unsalted butter, melted: Bind the crust together with fat that carries its own subtle richness.
- 2 tbsp granulated sugar: Just enough sweetness to make the crust taste like a treat, not a vehicle.
- 170 g bittersweet chocolate: Go for quality here because theres nowhere for mediocre chocolate to hide in such a simple filling.
- 115 g unsalted butter, room temperature: Temperature matters, so set this out early and walk away.
- 150 g granulated sugar: This dissolves into the butter during all that beating, creating the signature silkiness.
- 1 tsp pure vanilla extract: Vanilla is chocolate best friend, bringing out all those deep cocoa notes.
- 3 large eggs: Use pasteurized if youre worried about raw eggs, and definitely room temperature.
- 240 ml heavy cream, cold: Cold cream whips faster and holds its shape better.
- 2 tbsp powdered sugar: Powdered sugar dissolves instantly into cream without grit.
- 1 tsp pure vanilla extract: Because vanilla belongs in whipped cream too, always.
Instructions
- Build the Foundation:
- Preheat your oven to 175°C and crush those chocolate cookies until theyre fine crumbs. Mix them with melted butter and sugar until everything clumps together like wet sand, then press firmly into your pie dish, making sure to get up the sides.
- Set the Crust:
- Bake for about 10 minutes until the crust smells toasted and feels set to the touch. Let it cool completely because hot crust and silky filling are not friends.
- Melt the Chocolate:
- Gently melt your chocolate in a double boiler or microwave, stirring until its smooth and glossy. Set it aside to cool, because adding hot chocolate to butter is a disaster waiting to happen.
- Create the Silk:
- Beat butter and sugar together for several minutes until its fluffy and pale, then beat in the vanilla and cooled chocolate. Add each egg individually, beating for a full five minutes after each one.
- Patience is Everything:
- Pour that gorgeous mixture into your cooled crust and smooth the top. Refrigerate for at least four hours, but overnight is even better if you can plan that far ahead.
- Cloud Topping:
- Whip cold cream with powdered sugar and vanilla until soft peaks form, then spread or pipe it over your completely set pie. Add chocolate shavings if youre feeling fancy.
 Save
Save My daughter asked if she could lick the bowl after I made the filling, and I caught her eyes widening at how impossibly smooth and glossy it looked. She stood there with the spatula, making these little satisfied noises, and I realized that sometimes the simplest recipes create the most lasting memories.
Make Ahead Magic
This pie actually improves after a night in the refrigerator, giving all those flavors time to meld and the texture to settle into something extraordinary. I love knowing dessert is waiting, already done, while Im busy with everything else hosting requires.
Crust Secrets
Press the crumb mixture firmly and evenly, using the bottom of a measuring cup to really compact it into the corners. A well pressed crust holds together when you slice it, creating those perfect restaurant style edges that make serving feel special.
Serving Suggestions
Run your knife under hot water and wipe it dry between slices for the cleanest cuts. Serve this chilled but not rock hard, removing it from the fridge about fifteen minutes before you plan to dive in.
- A warm cup of coffee cuts through the richness perfectly.
- Small slices go a long way because this is intense.
- Leftovers keep for days, if they last that long.
 Save
Save Theres something deeply satisfying about slicing into a pie that looks like it came from a bakery case, knowing it came from your own kitchen and a little bit of patience.
Recipe FAQs
- → How do I achieve a silky smooth filling?
-
Melt chocolate gently and cool slightly before folding it into creamed butter and sugar. Beat eggs thoroughly for a light, airy texture that sets smoothly when chilled.
- → What type of cookies work best for the crust?
-
Chocolate wafer cookies crushed finely create a crisp, chocolate-flavored base that complements the filling well.
- → Can I prepare this dessert ahead of time?
-
Yes, the pie must chill for at least 4 hours, making it ideal for making a day in advance and storing refrigerated until serving.
- → How should I whip the cream topping?
-
Use cold heavy cream with powdered sugar and vanilla, whipping until soft peaks form for a light, fluffy topping.
- → Are there any alternatives for the crust to accommodate gluten intolerance?
-
Gluten-free cookie crumbs can be used instead of regular chocolate wafer cookies to make the crust gluten-free.